Welcome to DataCrunch.io
DataCrunch.io offers the lowest-cost dedicated NVidia Tesla V100 servers. You can choose a Fast.ai image, which contains all dependencies for Fast.ai v1 and v2.
Pricing
The suggested server for fast.ai is a 1V100.6V image, which has 1 dedicated NVidia Tesla V100 GPU with 6 CPU cores. The instance will cost $0.52/h when using the FastAI discount code FastAI20% upon topping up. The instances are billed per 10 minutes of usage.
Step 1: Signing up
Create your account on cloud.datacrunch.io. Verify your e-mail address to complete creating your account.
Step 2: Top up your account
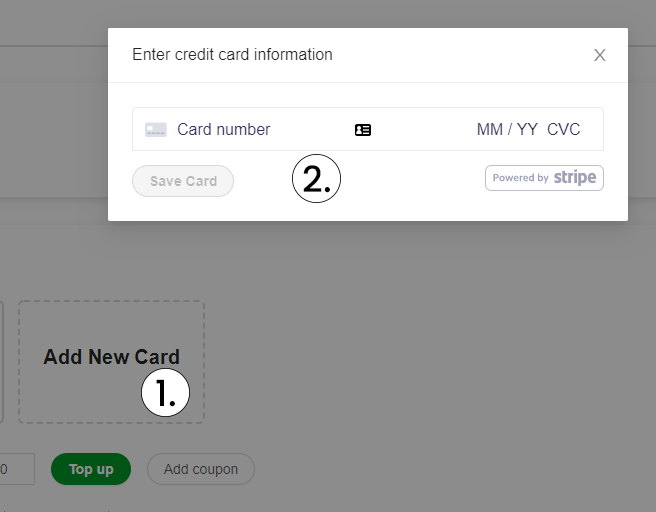
To prevent you from getting charged more than planned, we use a prepaid system. You can only use the amount loaded onto your account. To deploy a server, you will need to top-up an amount first. Add a credit card to your account and top-up after adding the coupon code.
Step 3: Create an SSH key.
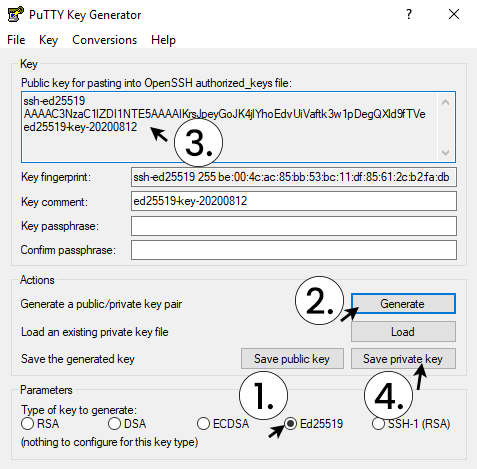
You will need an SSH key to allow SSH access to your instance. A key can be generated using command line tools or tools which provide a convenient user interface such as PuttyGen.
- Launch PuttyGen.
- Choose Ed25519. It’s the most recommended public-key algorithm available today.
- Click generate and move your cursor in the empty box to create some additional randomness.
- Copy the generated key to your clipboard, you will need it later.
- Save your private key somewhere safe.
Step 4: Deploy your instance
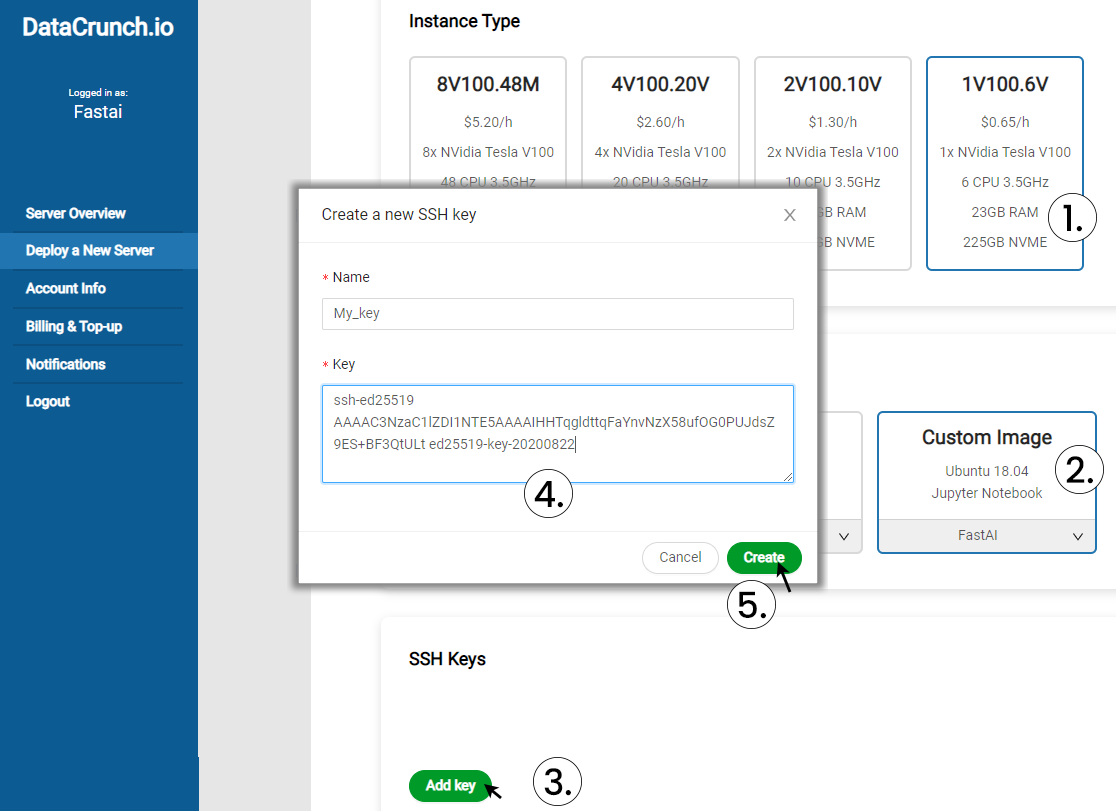
After logging in on and topping up your account, you can launch a server by clicking Deploy a New Server.
- Choose the 1V100.6V instance.
- Choose the Fast.ai image.
- Click ‘Add Key’.
- Name your key and paste the public key you generated in step 3.
- Click ‘Create’ to add your key to your account.
- Choose a hostname and description for your instance.
- Click ‘Deploy’.
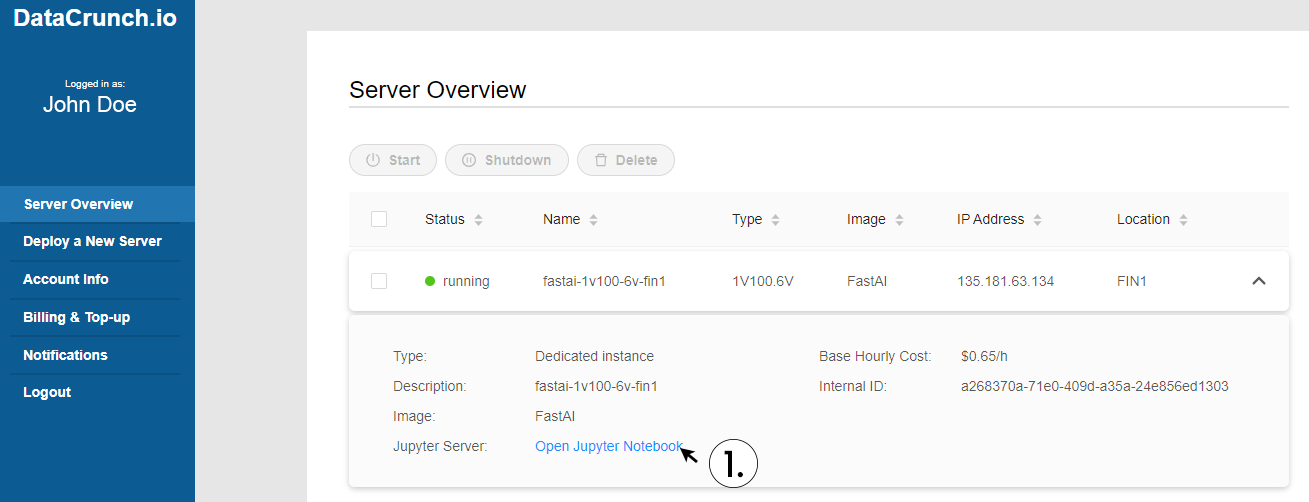
Step 5: Launch Jupyter Notebook
About 1 minute after deploying, your server is ready. When the status icon is ‘running’, click ‘Open Juypter Notebook’ to open Jupyter Notebook.
Step 6: Load your course material
You can ‘git clone’ your desired repo, either by using your SSH key for username ‘user’, by launching a terminal from Jupyter Notebook or by entering a command in a jupyer notebook (By executing a cell like ‘!git clone mygitlink.git’). Let’s launch a terminal from your notebook server:
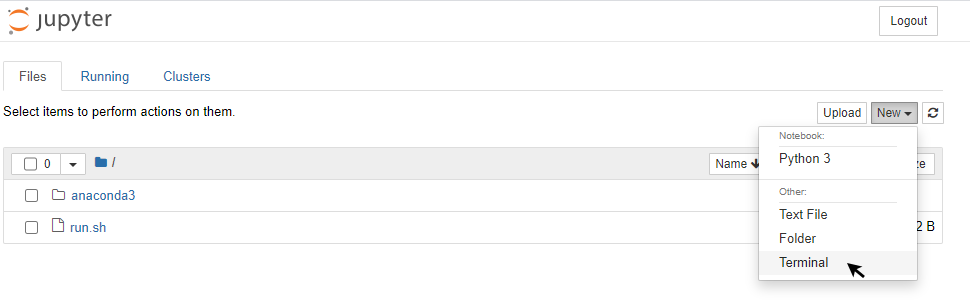
‘git clone’ your desired repository, for this course we run ‘git clone https://github.com/fastai/course-v4’

Step 7: Removing your instance
In order to stop your instance from decreasing your balance, you need to delete it. We are adding the option to store your state, at the moment deleting is the only option.
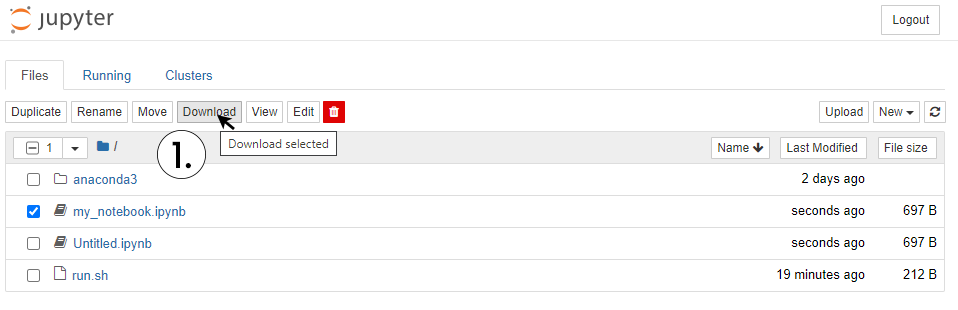
Save your notebooks to your PC if you desire to work on them later: